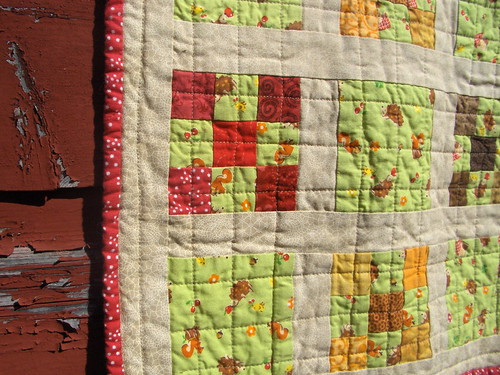
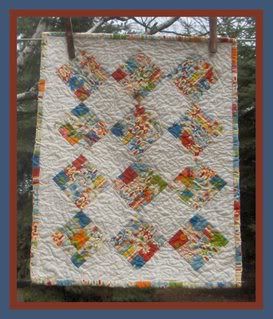
I bought this fabric as a kit at a wonderful quilt show in Nashville, TN. I loved the vintagey feel of the firetrucks and I knew it would be a great quilt for my littlest one.
Finally got around to finishing it a few weeks ago. I had the top pieced in the spring, then sent it off to my wonderful sister to machine quilt it (she has a mid-arm, but I'm not jealous or anything...) Then early this fall I sewed the binding on the front and the only left to do was HAND sew the binding to the back. I really dont' mind this process, but alas, it sat in my living room for months before I just picked it up and finished it. I'm so glad I did. Of course, I had to make a matching pillowcase :)
Saturday, December 27, 2008
Mark's Firetruck Quilt
A Christmas present still sitting on my shelves

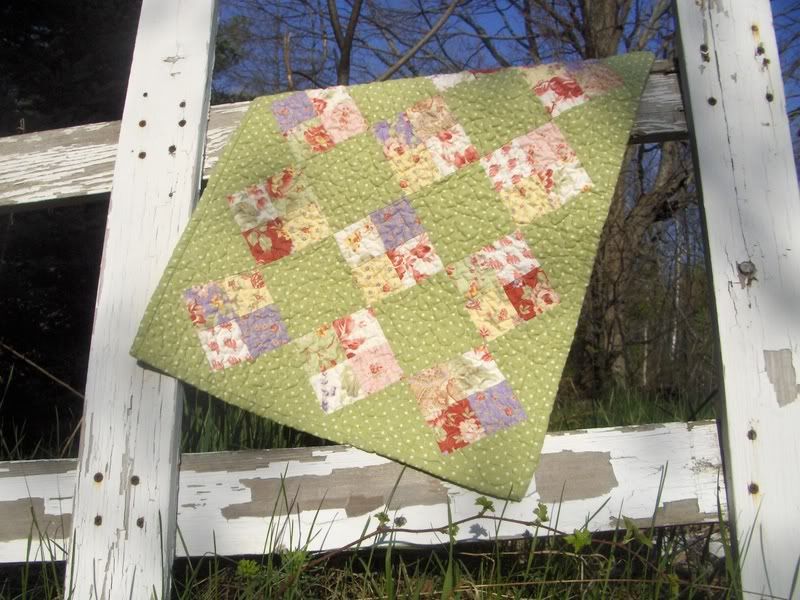
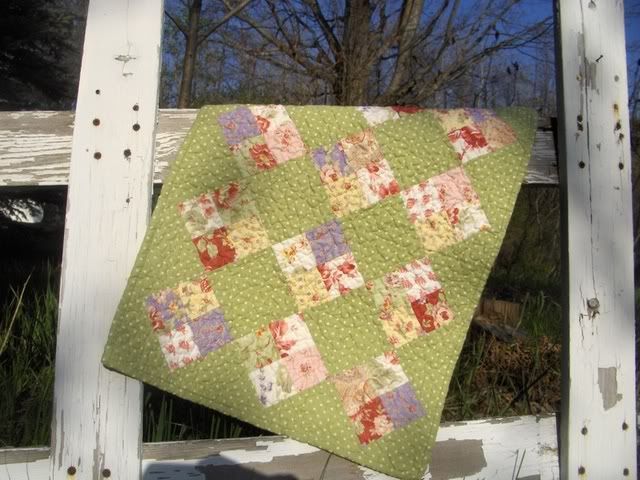
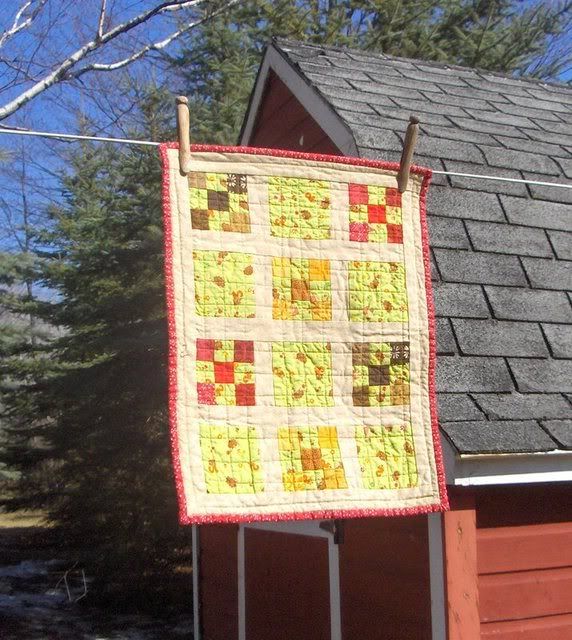
Ok, I made this lap quilt in plenty of time for Christmas, but alas, it is still sitting here on my bookshelves. Why? Well, I haven't labelled it. Seriously, of all the steps in making the quilt, why is this one holding me up?
All the fabrics in the field of the quilt are various Amy Butler lines. I participated in a quilt block swap at www.sewingmamas.com and ended up with a fantastic variety of 6 1/2" blocks. I used the free pattern on her site as my inspiration, but of course, changed many things.
I think the hardest part about this quilt was choosing the borders. I knew that they couldn't be too wild because of the busyness of the field. The blue is one of the Amy Butler solids and the light green is a small check from the City Girl line.
I chose to do a small stipple all over the whole thing. I adore the crinkly look, so I washed it and dried it before gifting. I also like to do this so the recipient isn't surprised and especially, displeased with the quilt after THEY need to wash it.
Tuesday, November 18, 2008
Floating Birdies

This is for our winter doll quilt swap at www.sewingmamas.com. I sure hope the recipient likes it. I had another top totally done, but I really wasn't happy with it. I went downstairs to talk to my stash and these fabrics jumped up and said, "Pick me!" I really did want to use the winter bird fabric, but wasn't sure how to properly show them off. I searched all over flickr and the web to find SOMETHING, but had no success. I had to just draft something and it had to be simple. Here is what I came up with. The blocks are finished 3" set in 100% linen.
Saturday, November 1, 2008
Long, Long time no see!
Hi, friends! I really have missed the occasional blog post. Life is settling down to a just busy pace, rather than horribly, frantically busy pace. DH returned from Iraq about a month ago, so we are so thankful for that. The kids are busy in school with just the little guy at home with me now.

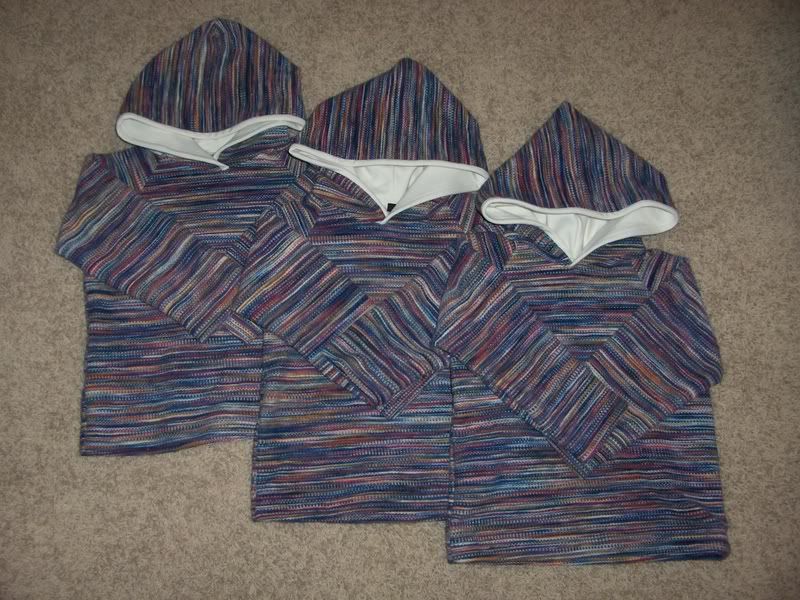
Here are some pictures of recent projects.

A trio of hoodies made with organic space dyed fleece.

A pair of chocolate velveteen skirts with just a bit of super cute japanese woodland creatures.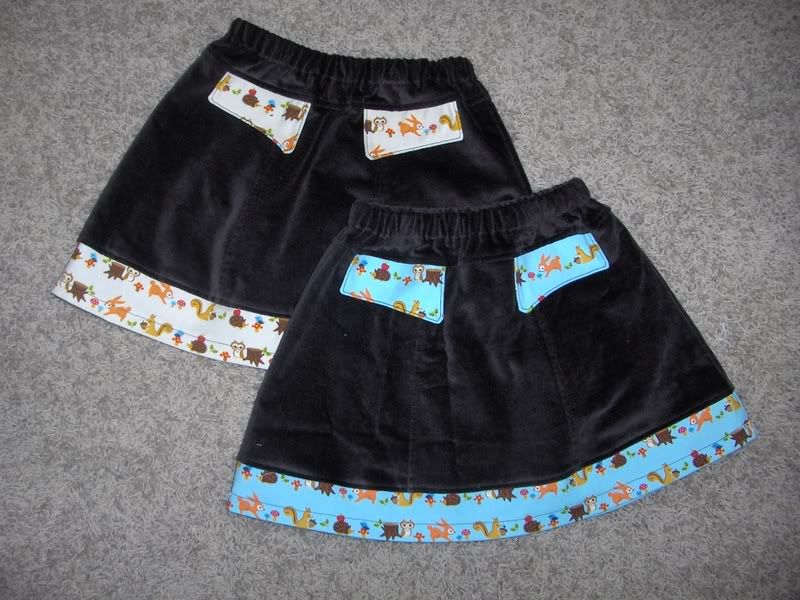

Sunday, July 27, 2008
Ittybittybutterflyquilt

Hi, friends! Well, the move is over and while there are still many, many boxes to unload, I'm so thankful all of our stuff is in one house.
I thought I'd show you all the latest doll quilt for a swap at Sewingmamas.com. The theme was summer.
I used a paper piecing block from quilterscache.com. I enjoyed the process, but I really wouldn't want to do a paper pieced queen sized quilt or anything! I hand embroidered the antennae in brown. My very nice and talented sister agreed to do the quilting for me IF I hand sewed the binding down on her swap quilt :) I really don't mind machine quilting, but I was right in the middle of a move and I had no time or space to get out my machines.
For the binding I pieced together 4 inch strips from the various fabrics in the quilt. I love a pieced binding.
Wednesday, July 2, 2008
Four Patch Doll Quilt Sew-Along Part Three!
Ok, the top is done!
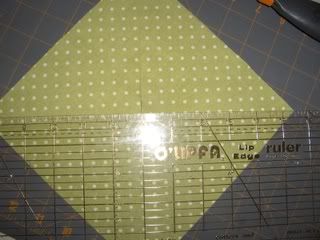
Now go ahead and square up your quilt however you would like (I, of course, don't mean make it a square, but make sure all edges are straight and the corners are 90 degrees)
The next step will be to layer the quilt, batting and backing.
Take your backing fabric and cut it 2" bigger than the quilt top on all sides and then do the same with the batting/flannel.
Next layer your fabrics, backing right side down then batting then quilt top right side up, just like you want it to be when it's finished. Make sure your fabrics are all nice and flat but not pulled out of whack.
You'll need to make sure that your layers don't shift during the quilting. I use a basting spray for doll sized quilts. You can also use safety pins and pin all the layers together about every 3" or hand baste.
To hand baste just use really huge stitches, start in the center of your quilt and stitch outward to the perimeter. You'll kind of end up with a sunburst pattern.
Here is a nice walk-through for pin-basting. http://crazymomquilts.blogspot.com/2...ste-quilt.html
Now it's time to quilt. I used a free motion stipple on this quilt or you could quilt in straight lines with a walking foot. Whatever fits your style.
Whichever method you choose, it's best to start in the middle of your quilt (or start at one edge and stitch to the middle right away) This ensures that you don't end up with lots of extra fabric puckering in the middle.
To free motion in any pattern, you'll need a darning foot for your machine, lower your feeddogs and then start meandering. Make sure that you take a couple of stitches before you start moving your fabric. This secures your stitches.
Practice, Practice, Practice on a couple of layers of flannel!!
If you want to learn from the VERY BEST, watch this video. This lady wins shows and awards all the time for her awesome machine quilting.http://www.needlepointers.com/displa...s/tvt035.asp
Easier than free-motion (although a doll quilt is a great way to get your feet wet with free-motion) would be to do straight stitching. J
ust mark your stitching lines with a disappearing ink fabric pen, put your walking foot on your machine and follow your lines. If you don't have a walking foot, you'll just have to work a little harder at keeping you layers from shifting.
Once it's quilted, cut off the excess batting and backing.
Next we'll need to cut the binding. Cut about 90" of 2 1/4" strips of your binding fabric. I cut these on the straight of grain. Sew your binding together at the short ends. Place two binding strips at a 90 degree angle, right sides together and sew from top left corner to bottom right. Cut off extra fabric.
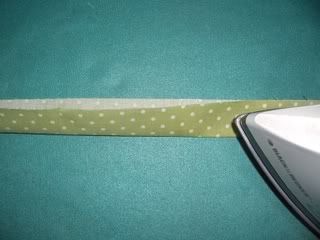
Now you have one long binding piece. Iron this in half lengthwise, wrong sides together.
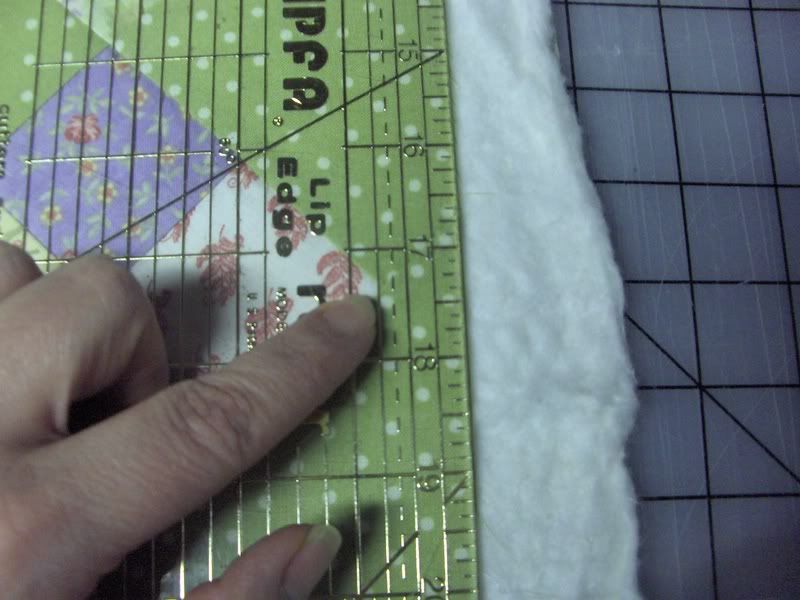
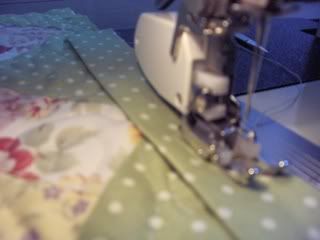
Now, starting at the middle of one of the sides and leaving about a 4" tail start sewing the binding to the quilt, raw edges together, using a 1/4" seam allowance. Sorry about this fuzzy pic.
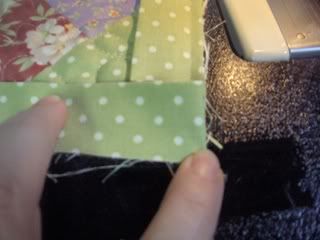
When you get to the corner, stitch up to 1/4" from the edge and remove from under your needle. Now take the fabric and fold it back away from the quilt. Then fold it back straight across the quilt, right where you want it to got next.
I'm so glad I have pictures. I can't explain this very well!

Start stitching again 1/4" away from the corner.
When you get to the starting point, leave about 4" in between your start and finish. Lay your quilt out flat and match up the ends of your binding and trim 1/4" up from the quilt. Open up your fabric strips and sew, right sides together, the two pieces together. Fold them again and stitch them down to the quilt. Please look at this link for pictures of this process. http://www.needlepointers.com/displa...inding-101.htm
Now take your binding and wrap it around to the backside and handstitch it down.
You're done! Don't forget to sign and date it somewhere!
Now go ahead and square up your quilt however you would like (I, of course, don't mean make it a square, but make sure all edges are straight and the corners are 90 degrees)
The next step will be to layer the quilt, batting and backing.
Take your backing fabric and cut it 2" bigger than the quilt top on all sides and then do the same with the batting/flannel.
Next layer your fabrics, backing right side down then batting then quilt top right side up, just like you want it to be when it's finished. Make sure your fabrics are all nice and flat but not pulled out of whack.

You'll need to make sure that your layers don't shift during the quilting. I use a basting spray for doll sized quilts. You can also use safety pins and pin all the layers together about every 3" or hand baste.
To hand baste just use really huge stitches, start in the center of your quilt and stitch outward to the perimeter. You'll kind of end up with a sunburst pattern.
Here is a nice walk-through for pin-basting. http://crazymomquilts.blogspot.com/2...ste-quilt.html
Now it's time to quilt. I used a free motion stipple on this quilt or you could quilt in straight lines with a walking foot. Whatever fits your style.
Whichever method you choose, it's best to start in the middle of your quilt (or start at one edge and stitch to the middle right away) This ensures that you don't end up with lots of extra fabric puckering in the middle.
To free motion in any pattern, you'll need a darning foot for your machine, lower your feeddogs and then start meandering. Make sure that you take a couple of stitches before you start moving your fabric. This secures your stitches.
Practice, Practice, Practice on a couple of layers of flannel!!
If you want to learn from the VERY BEST, watch this video. This lady wins shows and awards all the time for her awesome machine quilting.http://www.needlepointers.com/displa...s/tvt035.asp
Easier than free-motion (although a doll quilt is a great way to get your feet wet with free-motion) would be to do straight stitching. J
ust mark your stitching lines with a disappearing ink fabric pen, put your walking foot on your machine and follow your lines. If you don't have a walking foot, you'll just have to work a little harder at keeping you layers from shifting.
Once it's quilted, cut off the excess batting and backing.

Next we'll need to cut the binding. Cut about 90" of 2 1/4" strips of your binding fabric. I cut these on the straight of grain. Sew your binding together at the short ends. Place two binding strips at a 90 degree angle, right sides together and sew from top left corner to bottom right. Cut off extra fabric.


Now you have one long binding piece. Iron this in half lengthwise, wrong sides together.

Now, starting at the middle of one of the sides and leaving about a 4" tail start sewing the binding to the quilt, raw edges together, using a 1/4" seam allowance. Sorry about this fuzzy pic.

When you get to the corner, stitch up to 1/4" from the edge and remove from under your needle. Now take the fabric and fold it back away from the quilt. Then fold it back straight across the quilt, right where you want it to got next.
I'm so glad I have pictures. I can't explain this very well!


Start stitching again 1/4" away from the corner.
When you get to the starting point, leave about 4" in between your start and finish. Lay your quilt out flat and match up the ends of your binding and trim 1/4" up from the quilt. Open up your fabric strips and sew, right sides together, the two pieces together. Fold them again and stitch them down to the quilt. Please look at this link for pictures of this process. http://www.needlepointers.com/displa...inding-101.htm
Now take your binding and wrap it around to the backside and handstitch it down.
You're done! Don't forget to sign and date it somewhere!
Saturday, June 28, 2008
Four Patch Doll Quilt Sew-Along Part Two!
Ok,now that we've got our 4 patches sewn, we'll start working on the background.
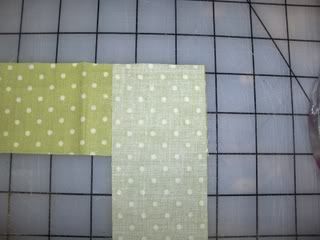
Cut 6 -4" squares of the background fabric
Then we will cut the triangles for the sides:
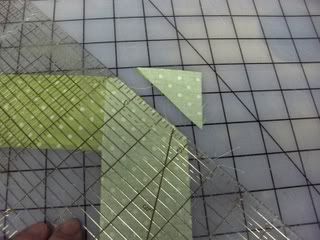
Cut 3 -7 3/4" squares.
Cut the squares into quarters diagonally.
Lay these triangles around the edges of the quilt.
Here's a little extra info :) You can make this quilt in any size and to figure out what size to cut your side triangles, you need this formula:
Count how many side triangles you need. Then divide that number by 4 rounding UP to the nearest whole number. Then take your block and measure it across the diagonal. Add 2" to that measurement. That is the size you want to cut your squares.
Next we will cut the triangles for the corners.
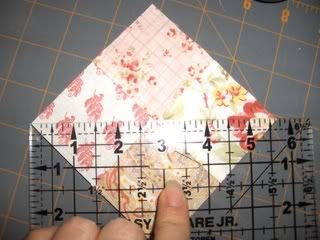
Cut 2- 5 1/2" squares of background fabric.Cut into half diagonally.
Yep, there's a formula for this, too. Take the measurement of your blocks (not diagonal this time) and add 1 1/2".
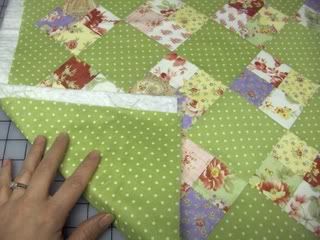
Now we get our first glance of how it will all look together. Lay out the blocks and triangles on your work area. The triangles will overlap, don't worry.
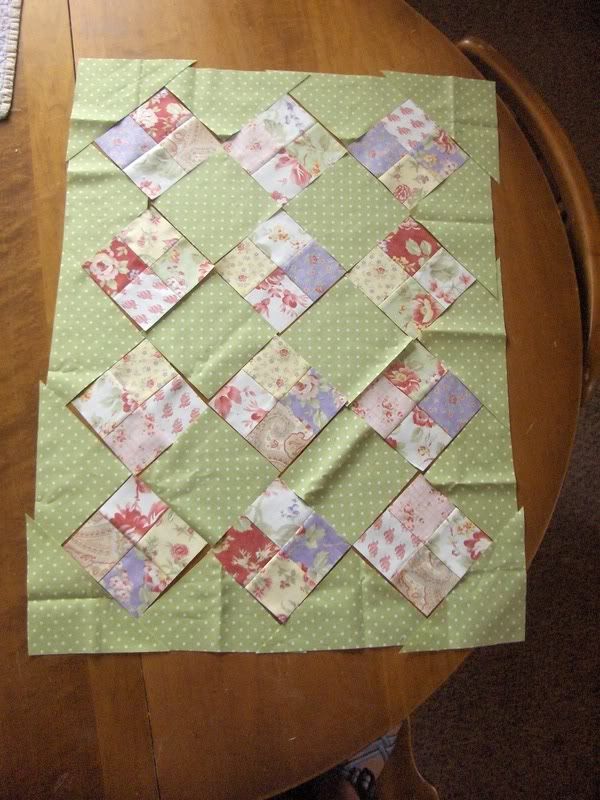
Now, it's time to sew them in diagonal rows. Don't worry about the corner triangles yet. Take the top right diagonal row and sew the 4 patch and two triangles together. Make sure that you match up the bottom of the triangle to the 4 patch. I like to keep the quilt laid out, rather than picking up all the rows at once. It helps me keep things in the right order.
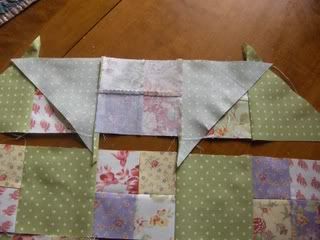
Continue sewing all the diagonal rows together. Next, sew the rows to one another, making sure that you match up the seams rather than the edges. You can see in the picture below that the points of the triangles stick out a bit.
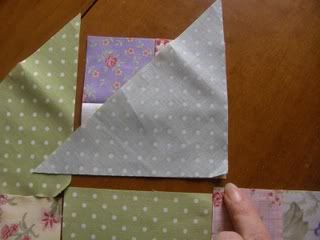
Time to add the corners. Center each corner triangle, right sides together, using the center seam of the 4 patch to place it. Sew together. Trim off all of those little points sticking out.

The top is pieced!! Next post will be quilting and binding :)
Cut 6 -4" squares of the background fabric
Then we will cut the triangles for the sides:
Cut 3 -7 3/4" squares.
Cut the squares into quarters diagonally.
Lay these triangles around the edges of the quilt.

Here's a little extra info :) You can make this quilt in any size and to figure out what size to cut your side triangles, you need this formula:
Count how many side triangles you need. Then divide that number by 4 rounding UP to the nearest whole number. Then take your block and measure it across the diagonal. Add 2" to that measurement. That is the size you want to cut your squares.

Next we will cut the triangles for the corners.
Cut 2- 5 1/2" squares of background fabric.Cut into half diagonally.
Yep, there's a formula for this, too. Take the measurement of your blocks (not diagonal this time) and add 1 1/2".
Now we get our first glance of how it will all look together. Lay out the blocks and triangles on your work area. The triangles will overlap, don't worry.

Now, it's time to sew them in diagonal rows. Don't worry about the corner triangles yet. Take the top right diagonal row and sew the 4 patch and two triangles together. Make sure that you match up the bottom of the triangle to the 4 patch. I like to keep the quilt laid out, rather than picking up all the rows at once. It helps me keep things in the right order.

Continue sewing all the diagonal rows together. Next, sew the rows to one another, making sure that you match up the seams rather than the edges. You can see in the picture below that the points of the triangles stick out a bit.

Time to add the corners. Center each corner triangle, right sides together, using the center seam of the 4 patch to place it. Sew together. Trim off all of those little points sticking out.

The top is pieced!! Next post will be quilting and binding :)
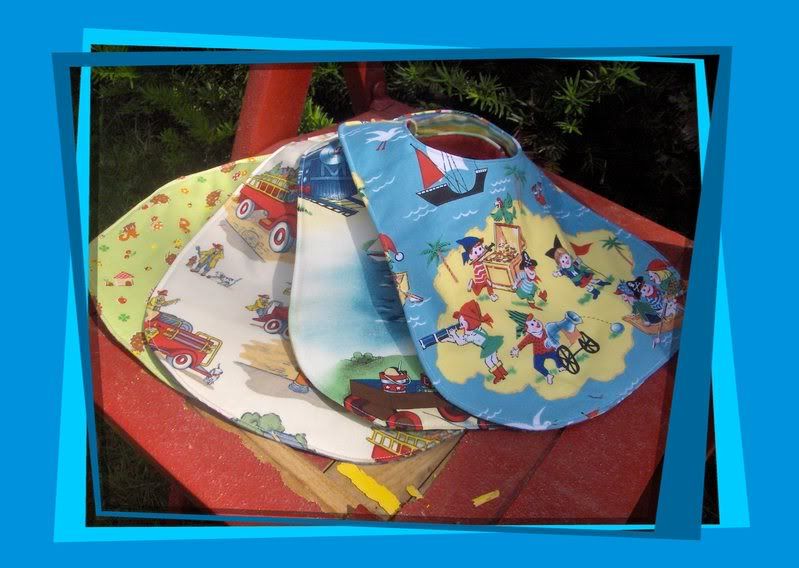
Thursday, June 26, 2008
Bibs
Creative title, eh? Sorry, I'm plain worn out from packing and cleaning and hot weather.
Great day today. I ran 5k on my treadmill! I've been doing the couch to 5k program, hoping to run in a race on the 4th of July. I truly couldn't imagine being able to run that far when I started. I'm just so stoked....and a little sore.
On the crafty side, which has been very sparse lately, I whipped up some baby bibs for my cousin and his wife expecting their first little one.

Sunday, June 22, 2008
Shopping with the kids
So, on Thursday, I packed up the three kiddos and headed to Traverse City to do some shopping. With gas at (gasp) over $4 a gallon, I hate to travel that far, but we had quite a few things that we couldn't get closer to home. It is our closest Jo-anns, however, and I never fail to find a few minutes to stop in and look for some goodies.
I didn't NEED anything, but with all the red tag stuff 1/2 off, I managed to find a few things that came home with me.
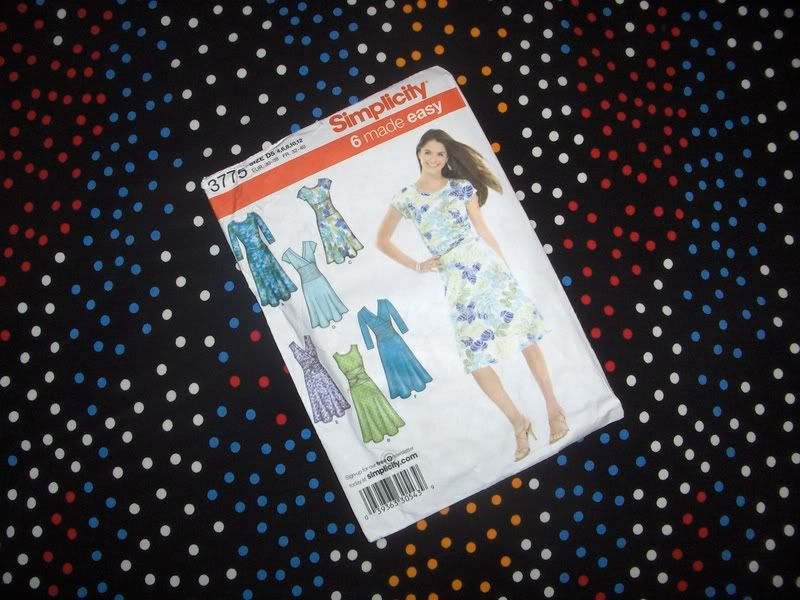
First, I found this poly knit. I've had this Simplicity pattern for a while. Normally I don't even bother with Big 3 patterns, much preferring Kwik Sew, Ottobre, even Burda. This pattern had great reviews at http://www.patternreview.com/ and I really liked the shaping of it, so I want to give it a try. I was thrilled to find an inexpensive knit to try it on.
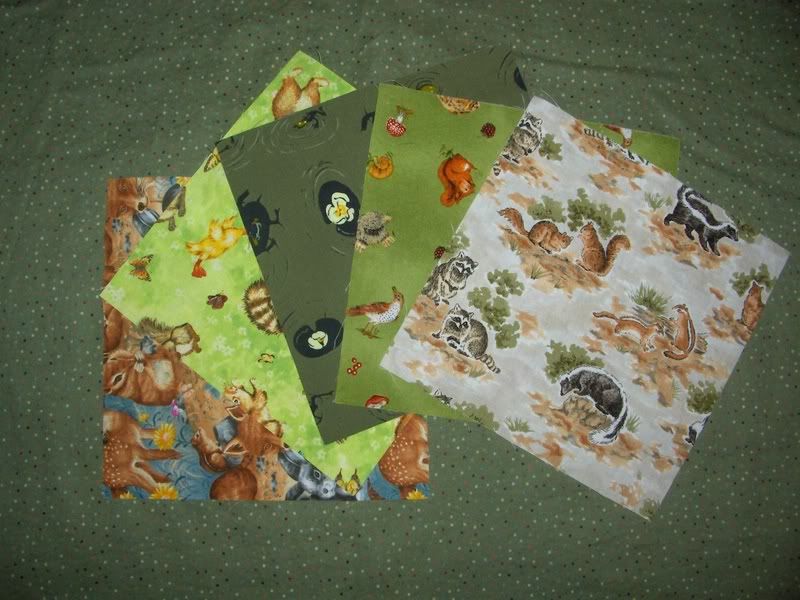
Next, I found this subtle dot on a dark sagey green to use as the background for my woodland animal swap squares. I think it will work nicely.
Finally, here is what comes of shopping with kids. My 3yo just HAD to have this. It was only $1.50 a yard....and it's cute....I just have no idea what it's going to be yet :)

I didn't NEED anything, but with all the red tag stuff 1/2 off, I managed to find a few things that came home with me.
First, I found this poly knit. I've had this Simplicity pattern for a while. Normally I don't even bother with Big 3 patterns, much preferring Kwik Sew, Ottobre, even Burda. This pattern had great reviews at http://www.patternreview.com/ and I really liked the shaping of it, so I want to give it a try. I was thrilled to find an inexpensive knit to try it on.

Next, I found this subtle dot on a dark sagey green to use as the background for my woodland animal swap squares. I think it will work nicely.

Finally, here is what comes of shopping with kids. My 3yo just HAD to have this. It was only $1.50 a yard....and it's cute....I just have no idea what it's going to be yet :)

Saturday, June 21, 2008
Four Patch Doll Quilt Sew-Along Part One
Finished Quilt size- 20" x 15 1/2 "
Ok, I'm going to do this in installments. There are quite a few pictures and I'll try to be as detailed as I can for those who aren't quilters. Those of you who are more experienced can just skip over all of my prattle Remember to have fun! It doesn't have to be perfect.
Select your fabrics:
Easy- choose 12 different coordinating fabrics. You'll need just one 5" square of each. Or just use 4 fabrics and all of the 4 patches will be identical.
Easier- -choose 1 fabric for a solid block instead of a 4 patch. This would be a great way to use a novelty. You'll need 12- 4" squares.
You will also need a setting block or background fabric. 1/3 yard should be plenty.I
t's time to think about what you would like to use for your binding and backing also. You'll need about 80-90" of 2 1/4" strips for the binding. That means two strips the full width of the fabric.
For the batting, you could use Warm and natural or any other thin batting OR flannel works really well in doll quilts, too.
The backing and batting pieces will need to be about 20"x 25"
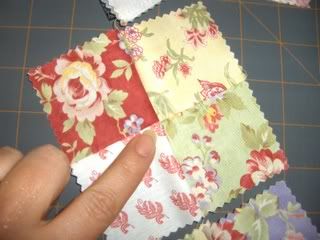
Cutting and sewing the 4 patch squares.
Cut your 5" squares into quarters or 2 1/2" squares. Lay one square on top of another with right sides together and chain piece all of them into sets of two. (Chain piecing just means that you don't want to cut your thread between squares, just keep on sewing, keeping the pieces close to each other. It will save time and thread )

NOTE: If you are only using 4 fabrics, only cut your 5" squares in half and then sew those short strips, right sides together, to another strip. Then press open and cut in half perpendicular to your seam. This will save you a little bit of time.
Cut the threads that connect them and press open, pressing the seam to one side or press seams open if you prefer. Usually in quilting, if you press to the side, you'll want the fabric pressed to the side of the darker fabric. This way the darker fabric wont show through the front.
Take the sets of two and sew them to another set of two. Chain stitch these,too!
It's more important to match up that middle seam than it is to match the edges.
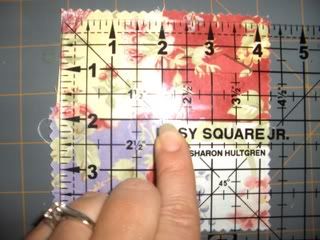
We'll do some trimming to get our blocks nice and straight. Now you have your 12 Four Patches!
We'll take them to the cutting board and square them up. Using the middle seam as a guide to mark your center, trim up the block to 4" Make sure you don't just trim the excess off of one side, but all four!
OK, that's all for part one.
Finished Quilt size- 20" x 15 1/2 "

Ok, I'm going to do this in installments. There are quite a few pictures and I'll try to be as detailed as I can for those who aren't quilters. Those of you who are more experienced can just skip over all of my prattle Remember to have fun! It doesn't have to be perfect.
Select your fabrics:
Easy- choose 12 different coordinating fabrics. You'll need just one 5" square of each. Or just use 4 fabrics and all of the 4 patches will be identical.
Easier- -choose 1 fabric for a solid block instead of a 4 patch. This would be a great way to use a novelty. You'll need 12- 4" squares.
You will also need a setting block or background fabric. 1/3 yard should be plenty.I
t's time to think about what you would like to use for your binding and backing also. You'll need about 80-90" of 2 1/4" strips for the binding. That means two strips the full width of the fabric.
For the batting, you could use Warm and natural or any other thin batting OR flannel works really well in doll quilts, too.
The backing and batting pieces will need to be about 20"x 25"
Cutting and sewing the 4 patch squares.
Cut your 5" squares into quarters or 2 1/2" squares. Lay one square on top of another with right sides together and chain piece all of them into sets of two. (Chain piecing just means that you don't want to cut your thread between squares, just keep on sewing, keeping the pieces close to each other. It will save time and thread )

NOTE: If you are only using 4 fabrics, only cut your 5" squares in half and then sew those short strips, right sides together, to another strip. Then press open and cut in half perpendicular to your seam. This will save you a little bit of time.
Cut the threads that connect them and press open, pressing the seam to one side or press seams open if you prefer. Usually in quilting, if you press to the side, you'll want the fabric pressed to the side of the darker fabric. This way the darker fabric wont show through the front.
Take the sets of two and sew them to another set of two. Chain stitch these,too!
It's more important to match up that middle seam than it is to match the edges.

We'll do some trimming to get our blocks nice and straight. Now you have your 12 Four Patches!
We'll take them to the cutting board and square them up. Using the middle seam as a guide to mark your center, trim up the block to 4" Make sure you don't just trim the excess off of one side, but all four!

OK, that's all for part one.
Wednesday, June 18, 2008
Playing, playing, playing
I'm still doing lots of experimenting with this blog. I need to try and figure out how to get my flickr photos to show up here.
A close up of the 9 patch hedgie doll quilt.
Why I named by blog Itty Bitty Quilts
Simple really. I just love doll quilts. I love making them. I love receiving them. I love seeing the ones other people make. I make lots of other stuff, too, but this is my main pre-occupation at the moment.
Here are just a few of the doll quilts that I have completed in the last couple of months.
These next two quilts were both for a quilt swap at sewingmamas.com.
Here are just a few of the doll quilts that I have completed in the last couple of months.
I created a sew-along for this doll quilt on sewingmamas.com. I might go ahead and post it here soon. We'll see.

These next two quilts were both for a quilt swap at sewingmamas.com.


Flickr Fun Meme

I'm so excited to be actually posting something! I honestly don't know if I'll share this blog with anyone, or if I'll keep up with it, but here's a start, whatever lies ahead.
Here's what this collage is all about.
a. Type your answer to each of the questions below into Flickr Search.
b. Using only the first page, pick an image.
c. Copy and paste each of the URLs for the images into fd's mosaic maker.
1. What is your first name?
2. What is your favorite food?
3. What high school did you go to?
4. What is your favorite color?
5. Who is your celebrity crush?
6. Favorite drink?
7. Dream vacation?
8. Favorite dessert?
9. What you want to be when you grow up?
10. What do you love most in life?
11. One Word to describe you.
12. Your flickr name
Subscribe to:
Posts (Atom)